Wednesday, October 30, 2013

Forming a hairspring

This week I've been working on forming my own 'balance complete'.  All you get are the parts you need: balance wheel, balance staff, collet, roller table, hairspring, and pins.  First one must rivet the balance wheel to the staff, then press on the roller table and make sure they are true (flat).  Then using a ruby-jawed vice you must 'poise' the balance to make sure the weight is evenly distributed along the whole diameter of the wheel.

Once the wheel is set you need to take the hairspring and either snap it or pin it to the collet, press the collet onto the balance wheel and then, using a counting platform find the 'counting point' of the spring.  This is the point where the springs length, when paired with a certain balance produces the desired vibrations,  in this case 18,000/hr.  Once this point has been located, you mark the position by clipping off the excess spring 1 coil further along the spring (as the spring is too long for the job anyway) 

Poising the hairspring is the tricky part, it involves lining up the point of attachment of the spring to the collet and the counting point as close as possible on one side of the hairspring.  This is accomplished using 'Leroy's method'.  Basically you take the angle from the counting point to the point of attachment following the spring (a) then take (a/3)=b, then take (b+a)= new point of attachment.  So just take your current point of attachment, move forward along the spring in that many degrees to find your new point of attachment.  If you measured correctly it will poise the spring.  Keep in mind you want to subtract about 60dgs from the above number for your actual cut because you need extra spring to fit inside the collet.

So now you should center and flatten your hairspring on its collet then put a bridge with a pinnable stud in a watch.  Push your hairspring through the stud and loosely pin it there.  Get it into the ballpark, meaning your new counting point (which you have now checked using the counting platform) should be in the vicinity of the regulating pins.  Then use your timing machine in frequency mode while slowly adjusting the amount of spring coming through the stud.  Once you are within 10 vibrations either side of your target drive the pin home and cut off excess spring.

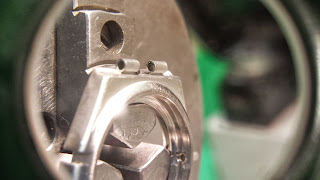
Now you can busy yourself with forming the dogleg which will interact with the pins, lead to the stud and allow the spring to breathe more freely.  I did this using a tool I created for this particular job.

Lastly, install everything into the watch, make sure everything is still flat and centered, set up your regulating pins and then regulate the watch to a good time.  If everything went smoothly and you didn't muck anything up you now have a working hairspring. 
Truing the balance wheel

Pressing on the roller table

Using the poising tool

More poising

Pinning the collet to the hairspring

The vibrating tool

Another shot of the vibrating tool

Here's the first hairspring I made in the watch, it keeps fairly good time for a first try!

This is a neat little steel template I created to help in forming the dogleg accurately.  The desired radius is scribed into the hardened metal and the 120dg desired angle is also scribed.  One simply has to screw the hairspring collet into the recessed hole then begin manipulation.  The steel is hardened to prevent tweezers scratching the metal while working.
Finally a old Elgin I fixed up for a customer. When it came in it had no minute hand, crystal and was not running.  Works great now.

Thursday, October 10, 2013

Overhaul & Refinishing Complete!

I have completed work on the Constellation.  The results are quite nice I think.  The only thing left to do now is run the complete watch on the winder for a few days to make sure it's keeping good time then mail it back.
To press the bezel back on and secure it with those little claw clamps i took a piece of grey PVC, turned it down even on the lathe then filed some notches in the plastic to accommodate the clamps. Then it was just a matter of using the crystal press and voila, reassembled bezel.

On the winder, this simulates the wearing of the watch

Custom made bezel press, the factory version is discontinued so I made this one.

The completed timepiece, just small traces of polishing compound to remove

Wednesday, October 9, 2013

Refinishing Progress

To remove the bezel on a constellation you first have to undo the bezel claws.  These are two gold grippers that fit into a slot on each side of the case and push down on the bezel, securing it.  To remove these (without the proper Omega tooling) I secured the case face down in a case holder.  After securing the case holder in a vice I covered the setup with plastic to minimize damage to the case.  Finally I used a brass punch to hammer down on each of the little claw legs a bit at a time until they all came loose. 

Once everything was disassembled I had work to do on 3 main components.  The case frame, the caseback and the bezel.  The main issue with the frame is that is has a very angular cut to it so one has to be very careful with the hardbuff wheel to keep from changing the dimensions of the case.  I was able to remove most of the scratches in this fashion but a few of the larger dings are still visible.  It's a tradeoff between a flawless finish and possibly ruining the angles of the case.  After brushing the fresh finish is a major improvement.

The back of the case and the caseback where years of hapless battery changers have attacked the area is pretty chewed up.  So I did my best to minimize the level of visable damage.  The damage is so severe you really can't expect to pry up on the case lip with a caseknife anymore.  So I took everything for a spin on the lathe and burnished and sanded out the majority of the damage.  Here again it's a balance between getting rid of all traces of damage, but possibly removing to much material the caseback won't be able to snap down anymore.

The bezel was easier, there was only minor scuffs and spinning the ring on the lathe and touching up the lined finished with a hard chunk of Artifex did the trick.  The original finish is back and looking great. 

The final challenge is to reassemble everything, and lacking the Omega case and bezel jig I'll need to fashion my own to get those little claws back and seated properly.  I am thinking it'd going to be necessary to fashion a die out of some plastic pipe.  I'll be attempting this operation tomorrow or Friday.  Stay tuned.

Claws, removed.

This is a fun and easy step.  Provides great results too, as long as you don't overdo it.

This is AFTER some burnishing.  I brought it down a bit with sandpaper after this then burnished again.  It's a very minor scar now.

Tuesday, October 8, 2013

Omega Constellation Overhaul

Today I started work on a Omega ladies Constellation.  The watch was experiencing intermittent stopping, the band and case were also quite scuffed up. 

To attempt to remedy the problem, in addition to installing a fresh battery I took the entire movement apart then cleaned and reassembled it.  The calibre of the movement is 1456, but we only had a tech sheet for a 1458 but this proved close enough for most figures and oiling schematics.  I have completed the overhaul of the movement and it has been keeping time for at least a couple of hours so far.  I have it on the watch winder for the night and we will see if it kept time when I return in the morning.

I also hard-buffed the steel link segments, white rouge buffed the gold links then used the bufflex wheel to apply lateral brushing on each steel link.  It turned out quite nicely, nearly as good as new!

The last step in the process is to take the case apart and refinish the frame and bezel.  The tricky part there is that Omega uses 4 small clamps that hold the bezel on and without the proper tool it is nearly impossible to get them back on properly.  I have an idea what the tool looks like though, so I may end up turning out my own on the lathe and fitting it onto the crystal press.  Will be an interesting process.  I will make sure to post final results.

The watch with a link removed to allow access to the caseback.  That little pin sure put up a fight.

Hand remover tool with handless dial

Dial, removed.  Notice the beautiful pearlage finishing to the dial plate.  No one but the watchmaker will ever see this touch.

It's a good idea to cover up the extremely delicate coil with a buff stick when working nearby.  Here I was unscrewing a circuit board screw.

The gear-train, bridge, stator and hack on the mainplate
Disassembled
The delicate electronic components stay out of the cleaning machine, they are cleaned by hand with circuit cleaner

After removing scratches with the hardbuff, the gold links are then masked off to prepare brushing

Brushing complete

Bracelet, refinished.  Just need to mask and brush the locking clasp.